Quickstart
(→Adding a dynamic IP customer) |
(→Adding a dynamic IP customer) |
||
| Line 179: | Line 179: | ||
{| border="1" cellpadding="2" | {| border="1" cellpadding="2" | ||
| − | |||
|Reseller || ''(automatically generated Id)'' | |Reseller || ''(automatically generated Id)'' | ||
|- | |- | ||
| Line 190: | Line 189: | ||
|Profile || '''PROFCLIENT''' ''(Profile name. Links the customer to a profile in the '''Profiles''' table)'' | |Profile || '''PROFCLIENT''' ''(Profile name. Links the customer to a profile in the '''Profiles''' table)'' | ||
|- | |- | ||
| − | |Blocked || '''0''' ''( | + | |Blocked || '''0''' ''(block subscriber flag)'' |
|- | |- | ||
|Pre_location || '''sip/sip''' ''(protocol used. Will be added before the called number. Write in '''lowercase''')'' | |Pre_location || '''sip/sip''' ''(protocol used. Will be added before the called number. Write in '''lowercase''')'' | ||
| Line 198: | Line 197: | ||
|- | |- | ||
|Expires|| ''(automatically updated when dynamic IP expires)'' | |Expires|| ''(automatically updated when dynamic IP expires)'' | ||
| + | |- | ||
| + | |Formats || '''ulaw''' ''(optional codec formats separated by comma, g729, ulaw, ...)'' | ||
| + | |} | ||
| + | |||
| + | ===Adding a fixed IP customer=== | ||
| + | |||
| + | |||
| + | {| border="1" cellpadding="2" | ||
| + | |||
| + | |Reseller || ''(automatically generated Id)'' | ||
| + | |- | ||
| + | |||
| + | |Trusted Peer || '''11.22.33.44''' ''(authorized IP address)'' | ||
| + | |- | ||
| + | |Dynamic_ip || '''0''' ''(flag for dynamic IP use)'' | ||
| + | |- | ||
| + | |Subscriber || '''user@domain.com''' ''(subscriber name)'' | ||
| + | |- | ||
| + | |Profile || '''PROFCLIENT''' ''(Profile name. Links the customer to a profile in the '''Profiles''' table)'' | ||
| + | |- | ||
| + | |||
| + | |Subscriber_out || '''OUTNAME''' ''(outgoing subscriber name in case subscriber provides outgoing routes)'' | ||
| + | |- | ||
| + | |Blocked || '''0''' ''(block subscriber flag)'' | ||
| + | |- | ||
| + | |Pre_location || '''sip/sip''' ''(protocol used. Will be added before the called number. Write in '''lowercase''')'' | ||
| + | |- | ||
| + | |Post_location || ''(automatically updated IP address after SIP client registers to softswitch)'' | ||
|- | |- | ||
|Formats || '''ulaw''' ''(optional codec formats separated by comma, g729, ulaw, ...)'' | |Formats || '''ulaw''' ''(optional codec formats separated by comma, g729, ulaw, ...)'' | ||
Revision as of 08:05, 12 September 2012
This document details the steps needed to get your x164 switch started.
Contents |
Preface
The x164 softswitch is based on yate. The softswitch can be installed on the servers of the x164 customer or is hosted by x164 in the datacenter.
We recommend to install the softswitch as a OpenVZ virtual machine. OpenVZ offers near-bare-metal performance. The advantage of virtualization are: Easy backups, easy migration to different hardware in case of failures or hardware upgrades. x164 provides a OpenVZ template for download which is a ready-configured softswitch.
Softswitch installation
Setup Linux Host for OpenVZ
Use of Debian Squeeze is recommended for its stability, but you can use other Linux distributions as you wish. You can look for the proper option for your machine here. Installation guides are also available for the different supported architectures here.
This website offers a screenshot based tutorial that explains how to make a bare-bones installation without a graphical desktop environment. We suggest to create a separate partition /vz to store the virtual machines, as for example in the following scheme.
Disk partitioning
The recommended partition scheme is the following:
| Partition | Size | File system | Comments |
|---|---|---|---|
| /boot | 500 MB | ext2 | |
| swap | ~ | swap | Size should be the same as RAM |
| / | 20 GB | ext4 | |
| /vz | remaining disk space | ext4 | OpenVZ virtual machines will be installed in this partition |
It is encouraged that you follow the order shown in the table when partitioning.
Updating and upgrading
After completing the installation you should run the following commands:
sudo apt-get update
sudo apt-get upgrade
This ensures you have the latest version of the installed packages.
Remote SSH access
If you want to work on your server remotely from a remote client, it is recommended to use a Secure Shell (SSH) protocol. Install a SSH server:
apt-get install openssh-server
Now you can open the terminal on your workstation and type the following to log in the host machine:
ssh root@[ipAdress]
It will ask you for the hostname's password. From now on you can continue working from your workstation remotely.
Midnight Commander
We recommend using a visual file manager like Midnight Commander (mc) to make working with the command line easier. To install it in your server enter this command:
apt-get install mc
mc
You can find more information about mc in [1]
Webmin installation
It is recommended that you use Webmin to easily configure your softswitch. Run the following command to avoid dependency issues
apt-get install perl libnet-ssleay-perl openssl libauthen-pam-perl libpam-runtime libio-pty-perl apt-show-versions python
Then you can download Webmin
wget http://prdownloads.sourceforge.net/webadmin/webmin_1.590_all.deb
and install it
dpkg --install webmin_1.590_all.deb
OpenVZ Installation
Installation for Debian systems is detailed in this tutorial. You can also refer to the OpenVZ installation guide for Debian and other operating systems.
Softswitch template installation
To download the softswitch template just run the following command:
wget http://www.x164.com/index.php/download-and-install
and create the softswitch container.
vzctl create [CTID] --ostemplate nameOfTemplate
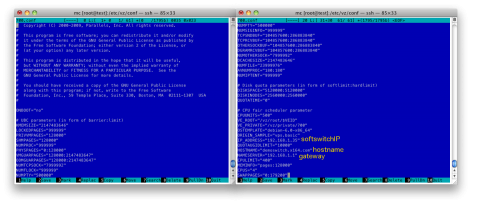
Once you have created a new [CTID].conf file will appear at /etc/vz/conf. There you can set the VM's IP, gateway and hostname as it fits your network, among other parameters. This is an example of what the .conf file should look like:
Then you can start your softswitch container:
vzctl start [CTID]
Here you can find some of the basic operations needed to work with your container.
Web Configuration of the x164 Service
Setup softswitch to connect with x164
The softswitch needs to connect to the x164 database to retrieve routing information and to the x164 radius server to send call details records. We will initiate fake calls from a softphone to test whether everything works correctly.
Editing register.conf file
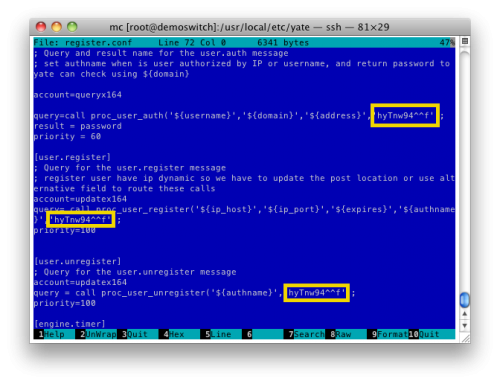
Go into the /usr/local/etc/yate folder of your virtual machine and open the register.conf file. In this file the string 'hyTnw94^^f' must be substituted by your own secret key for MySQL procedures in yate.
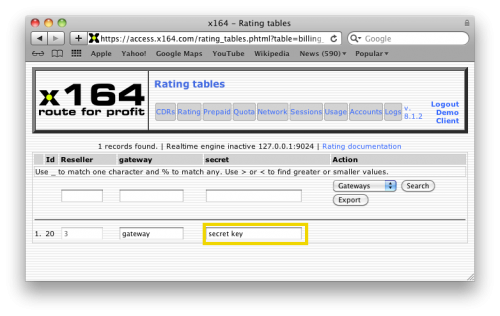
To find your key, log into https://access.x164.com. Go to the Rating tab and select Gateways in the Action area.
Setup Firewall on Softswitch
The firewall can be setup comfortably with Webmin:
https://softswitchIP:10000
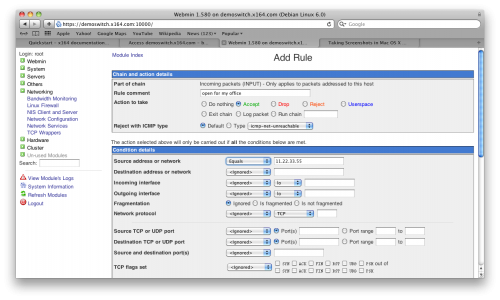
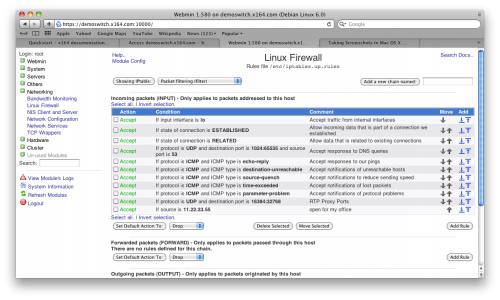
In the Networking/Linux Firewall subsection, Default Action should be set to Drop. Then a new rule must by added by clicking Add Rule. This new rule must be defined like this
where 11.22.33.55 is the IP of your workstation. The firewall must be opened for all IPs from which you receive VoIP traffic. Now the Linux Firewall menu should look like this:
Press the Apply button to activate the rules.
Verify yate functionality
You need to verify that yate is working. Go to the terminal and log into the softswitch through port 29. Using a port which is not the standard ssh port 22 reduces the chance that some weak password is hacked.
ssh root@[softswitchIP]:29
Then see what is happening in the port that will receive the fake call. The softswitch listens on udp port 5061 and not the standard port 5060 to avoid attacks.
usr/local/etc/yate ngrep port 5061
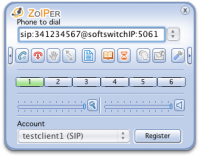
Now you can make a call from a softphone like Zoiper and verify if yate is working.
When you dial you will see in the terminal that communication has been established between the softswitch and the workstation IPs, confirming that yate is functioning.
Connection to Radius server
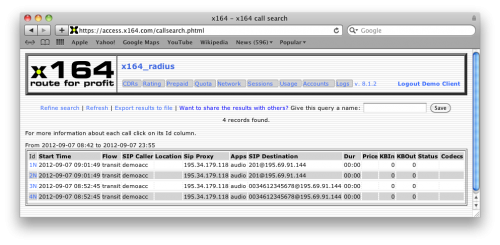
Login into https://access.x164.com and click search in the CDRs tab. The test calls your did should be shown, confirming that the softswitch is connected to the x164 radius server.
Adding subscribers to the database
We are going to create a caller subscriber and a subscriber for one of our phone lines and make a call from one to another.
To see your customers table go to the Rating tab and select Customers in the Action field. Here you can find information about the fields in this table
Adding a dynamic IP customer
The following bold fields must be set, the remaining fiels may stay empty.
| Reseller | (automatically generated Id) |
| Dynamic_ip | 1 (flag for dynamic IP use) |
| Subscriber | user@domain.com (subscriber name) |
| Password | verysecret (user password) |
| Profile | PROFCLIENT (Profile name. Links the customer to a profile in the Profiles table) |
| Blocked | 0 (block subscriber flag) |
| Pre_location | sip/sip (protocol used. Will be added before the called number. Write in lowercase) |
| Post_location | (automatically updated IP address after SIP client registers to softswitch) |
| Expires | (automatically updated when dynamic IP expires) |
| Formats | ulaw (optional codec formats separated by comma, g729, ulaw, ...) |
Adding a fixed IP customer
| Reseller | (automatically generated Id) |
| Trusted Peer | 11.22.33.44 (authorized IP address) |
| Dynamic_ip | 0 (flag for dynamic IP use) |
| Subscriber | user@domain.com (subscriber name) |
| Profile | PROFCLIENT (Profile name. Links the customer to a profile in the Profiles table) |
| Subscriber_out | OUTNAME (outgoing subscriber name in case subscriber provides outgoing routes) |
| Blocked | 0 (block subscriber flag) |
| Pre_location | sip/sip (protocol used. Will be added before the called number. Write in lowercase) |
| Post_location | (automatically updated IP address after SIP client registers to softswitch) |
| Formats | ulaw (optional codec formats separated by comma, g729, ulaw, ...) |
Linking customer to a profile
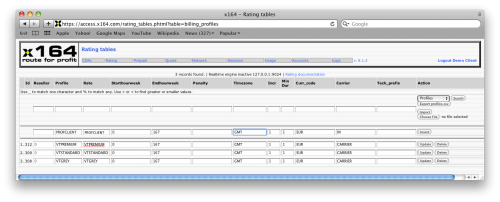
Select Profiles in the Action area and add a new profile. To link a customer to a profile the field Profile must be the same in the two tables. To make the subscriber a caller you must enter IN in the Carrier field. Here you can find more information.
Linking rates to profiles
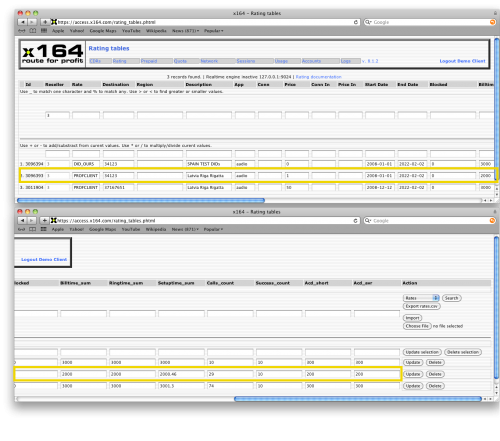
Go to Rates in the Action area and insert a new rate. The fields are explained Here.
Registering with the new customer account
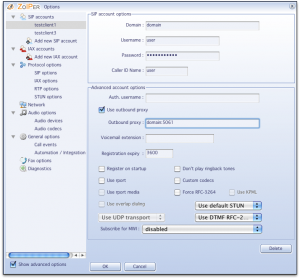
Create an account for the new customer with your softphone:
Creating a DID subscriber
Add a new DID customer
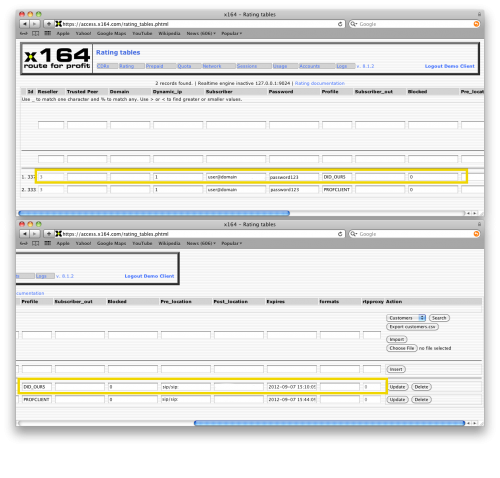
Go to the Rating tab and select the Customers table. Add a new customer with a new profile as in the following image:
Link DID client to a DID profile
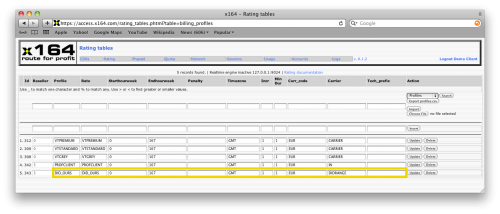
In the Profile table, add a new one specifying DIDRANGE as the carrier.
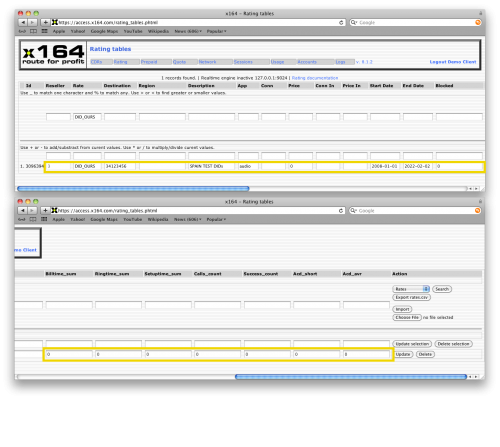
Create a rate for the profile
Go to the Rates table and add a new entry for the profile you just have created. Note the price should be in any case lesser than the one for the caller, otherwise the system will not respond because there wouldn't be a profit. For more information about each particular field, check the documentation
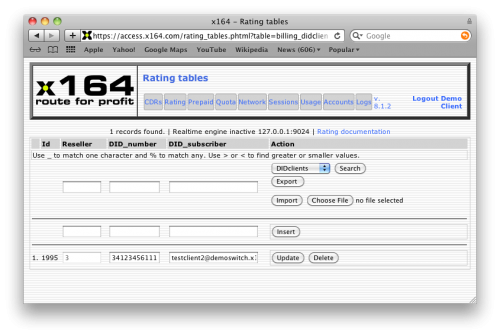
Add a DID client
In the DIDclients table add the line you want to test:
Make a first call
Make sure both your softphone and your line are registered in Yate. Now you can call your line from the softphone.
